Sunday, June 30, 2013

Remembering a Man I Never Knew


[image viasheldonbrown.com]


Because I live in Boston and have been writing about Harris Cyclery from the start of this blog, I am sometimes asked whether I knew Sheldon Brown. What was he like? Did he inspire my love of English 3-speeds? But I regret to say, that I have never met him. The first time I walked into Harris Cyclery was just over a year after Sheldon Brown's death, the anniversary of which was last week. I was already reading his articles at that time (this was Spring ), but did not realise that he'd passed away. And then at Harris, there was this basket on the counter full of little flyers with his picture and "1944 - " underneath it. Seeing the flyers was like a punch in the stomach. "Oh no, he died!" I blurted out without thinking. I remember the moment well, and particularly the disappointment and sadness of it. Somehow, this man's articles about bicycles had managed to fill me with enough affection toward him, so that his death felt like a personal loss - despite learning of it a year after the fact.


Sheldon Brown was a bicycle mechanic, whose technical knowledge - particularly of classic and vintage bikes - was not only vast, but presented in the most captivating manner through a seemingly endless series of articles, glossaries and instruction pages. He shared his writing, including technical information, history, and decades worth of personal journals and travelogues, via a website he developed with Harris Cyclery, which continues to be maintained today. His writing was sincere, funny, wacky, and excellent in equal measure, and its influence cannot be overstated. I meet people from all over the world who will casually mention that they learned how to work on bicycles "from reading Sheldon Brown," or that thanks to his website they identified an old bike found in the cellar, or even that they took up randonneuring after reading his online journals and descriptions of France. Bicycle forums and news groups are replete with Sheldon Brown references and quotes.


But you can find a far better description of all this in his obituary in The Times, and thetribute on Bike Snobis worth reading as well. I don't want to attempt to paint a portrait of a man I never knew. But I do want to acknowledge his impact on me personally.


[image via sheldonbrown.com]


Like so many others, I stumbled upon Sheldon Brown's website while looking for information on vintage bicycles. And I believe it's what I found in his writing that turned what could have been a passing curiosity into the seeds of an obsession. I cannot put my finger on what it was exactly that drew me in: Maybe it was his easy relationship with technical and historical information, which made everything read like a story, rather than a boring manual. Maybe it was his open-minded curiosity about different types of bicycles and different aspects of cycling. Or maybe it was the way he embraced eccentricity, without trying to either downplay or justify it. It's hard to say, but whatever it was - it got through to me and engaged my imagination. I am just one person, but I am certain there are many, many others who would say the same. And that's quite something.


For the last several years of his life, Sheldon suffered from Multiple Sclerosis and was unable to ride his beloved bicycles, yet managed to write an article entitled The Bright Side of MS. But the dominant image I have of him, is that of a young, strong man riding crazy bikes, as captured in his many black and white photos taken with a self timer.


Sheldon Brown was an avid photographer, and the above picture he took of himself has turned out to be chillingly prophetic. The impact he's had on "bicycle culture" is so strong, that three years after his death his presence remains vibrant. I am extremely happy about that. And I thank him for all the help and inspiration he has given me, despite my never having had the privilege of meeting him.

Saturday, June 29, 2013

Look Out Places


The Nature Center is set up so that there is no way to get up close to the ponds where the ducks and geese hang out the most. It is for the protection of the waterfowls. They are kind of like the things that hunters and reserch people or photogephers set up to get close to birds or animals without being seen that are usually called 'blinds'. They have put up block walls with square holes in them to look out onto the ponds and where you can take photos. All of these and the ones of the previous post with the geese were taken from one of the 'blinds'.


5-Speed Conversion!

My conversion of the Mercier mixte to a 5-speed is pretty much complete, and it worked out nicely. I've received some questions about the process since I first mentioned my plan to do this, so I include answers to these questions here.

What is a 5-Speed Conversion?
A 5-speed conversion refers to transforming a vintage 10-speed bicycle into a 5-speed by removing one of the two front chainrings and the front derailleur system (see before and after pictures above). In the end, the bicycle is left with a much simpler set-up of 5 chainrings in the rear, 1 chainring in the front, and a single gear shifter. It works much the same as a 5-speed hub, only the gears are visible rather than hidden inside the hub.

Why do this? Doesn't it mean you have fewer speeds now?
Hard question to answer, but I will try: The advantage of a derailleur over an internal hub, is that it allows for much wider spaced gearing. Riding the Mercier around hilly areas, I can get by perfectly well with just the middle 3 rear gears. The 2 extra rear chainrings provide a nice "just in case" buffer of one higher and one lower gear than I'd ever need, but the second front ring (which provides 5 additional speeds) and the whole front derailleur system (which switches between the two front rings) are useless entirely in the context of where and how I plan to ride this bike. Given my certainty of this, converting it to a 5-speed made sense, because it would simplify the handling of the bicycle and it would get rid of extraneous components. Also, this bike (as many older French bicycles) was originally designed to have a rear-only derailleur system. This is evident, because it has a braze-on (on the downtube) for just a single gear shifter. So converting it to a 5-speed reverts to a traditional design.

If you're going to make it a 5-speed, why not use a 5-speed hub and ditch the derailleur system all together?
The main reason, is that no existing 5-speed hub could give me the same customised, wide spacing as a 5-speed rear derailleur. It's not just about how many speeds you have, but how useful each of those speeds are. Additionally, it would cost a ton of money to rebuild the rear wheel with a 5-speed hub, whereas the 5-speed derailleur conversion was inexpensive. And finally, I am trying to keep this bicycle fitted with traditional components, and French bicycles were traditionally fitted with derailleurs.

How was the conversion done?
Keeping in mind that the process will differ depending on your current set-up, here is what generally needs to be done, step-by-step:

1. Front chainring removal
Since you will only have one chainring in the front now, you need to figure out how to get rid of the second one. The main issue here has to do with how the crank arm is attached to the ring(s). On some bicycles, it is possible to simply remove the extraneous chainring and the remaining chainring will hold up the crank. On my Mercier, the two rings are a unit, attached to the crank via a proprietary bolt system. To make a long story short, we could not simply remove the extra ring. Rather than get an entire new chainring and crank system, it occured to me that perhaps the teeth on the bigger chainring could be filed off - turning the ring into a chainguard. I discussed the idea with metalworker and bicycle mechanic Jon Gehman, who is a reader of this blog, and he agreed that this was a good way to go. I then sent him the chainring for a "de-toothing" service, and he did a spectacular job.

Here is a close-up of what was formerly the larger chainring. Notice how beautifully the edge is done - giving it a professionally finished look.

2. Front derailleur removal
This was the easiest part. The Simplex front derailleur simply unbolts and removes. On the picture above you can see that the rainbow decal is a little worn where it used to be, but that is all.

3. Changing the shifters
The ease or difficulty of this step depends entirely on what sort of shifters you have to begin with. If your bicycle has separate (unconnected) shifters for the rear and front derailleurs, then you simply remove the one that controls the front and you are done. If your shifters are a unit, then you will have to remove them and install a single shifter instead. Above is a vintage Huret single shifter for mounting on the stem that I bought for this purpose. It's beautiful, "period-correct", and can be bought fairly inexpensively. The Co-Habitant installed the shifter and connected the cable to the derailleur.

Here is the Huret shifter installed on the stem. I am not 100% sure though that this is the ultimate solution. Originally, the Mercier had downtube shifters, and this is where the single braze-on is located. However, I do not understand how one is supposed to use downtube shifters on a near-upright bicycle. At least for me, and in traffic, they were too much to handle - especially given that the shifting has to be done with the right hand.

So now there is a cable stopper where the downtube braze-on is, and the cable then extends further to the stem. Though the Huret shifter is beautiful on its own, I am not sure how fitting it is here. For instance, the reason it is not all the way at the bottom of the stem, is that placing it here makes it hit the handlebar when it is moved all the way forward. Hmm, right? Your thoughts on this welcome.

Overall I am thrilled with the 5-speed conversion. The Mercier is light, easier than ever to handle, and now ready for its fate as Studio Bike. I admit that I am reluctant to send it over to the Studio and quite like having it here at home. But I also look forward to exploring a new neighborhood together... and to having less bike clutter in our apartment!

Friday, June 28, 2013

Tuesday, June 25, 2013

The Swift Polaris Porteur Bag

Swift Industries Polaris Bag

I am trying out a Swift Industries Polaris Porteur Bag - a front bag designed specifically to fit on porteur style racks, such as those from Velo Orange and Soma. Handmade in the USA, this is a very large, "everything but the kitchen sink" kind of bag that's surprisingly stable, requiring nothing but the rack for support.I am using it on an upright bicycle with low trail geometry.


Swift Industries Polaris Bag

Founded in , Swift Industries is a 2-person shop in Seattle. Frequentbike travelersMartina and Jason started out making custom touring panniers, eventually expanding into saddlebags, handlebar bags and city bags. Today they have streamlined their process so that standard models can be customised with a selection of colours and features.


Swift Industries Polaris Bag

The $230 price tag of the Polaris includes choosing the colour of the fabric, trim, stitching, and reflective strips. Being the boring customer that I am, I chose an all-olive canvas with brown trim, brown stitching, and silver reflective strips. I opted to forgo the optional clear map case.


The boxy22"x14.5"x12" bag attaches to the Porteur rack at 5 points: Two sets of adjustable straps with buckle closures secure to the rear of the rack's platform, two more secure to the sides of the platform toward the front, and an additional velcro strap secures to the rack's "tombstone" at the rear (this last attachment is not shown in the picture).


Swift Industries Polaris Bag

Initially I was somewhat skeptical about the attachment system. I doubted that such a large bag would be sufficiently stable with only the lower support, and I thought the bag might be time-consuming to attach and detach. But I was glad to be proven wrong on both accounts. The bag contains some very effective stiffeners inside, and combined with the adjustable straps, this keeps it entirely free of either side to side, or fore and aft sway. The straps and buckles are fairly easy to manage, taking no more than 30 seconds in total to attach and less than that to detach.


Swift Industries Polaris Bag

The bag features a cordura exterior, with a waterproof vinyl interior. At the front is a zippered front pocket and a headlight mount. D-rings are added to the sides for an optional shoulder strap. For those who do not wish to attach a strap, a short carrying handle is attached at the rear. On the left side is an external U-lock holster that fits a standard sized lock snugly and securely.The flap, featuring reflective strips and expandable straps with buckle closures, opens away from the rider.


Swift Industries Polaris Bag

Both functionally and aesthetically, the design of the Polaris strikes me as a messenger bag that has been converted for porteur carry. The main compartment is immensely expandable. The spacious interior is free of dividers - you just pile things in. There are internal pockets handy for carrying tools and spare tubes.


Swift Industries Polaris Bag

Given the size and design of the Polaris, it is not feasible to retrieve objects form the bag while cycling. Opening and closing it are multi-step processes. And once expanded, the height of the open bag might block the rider's view on the bike.


Swift Industries Polaris Bag

Depending on the rider's size, it may not even be feasible to retrieve things from the bag while remaining standing over the bike - the reach to the buckles at the front is fairly dramatic. In short, the Polaris is not designed for easy en route access; it is assumed the rider will access the bag once they reach their destination.


Swift Industries Polaris Bag
A number of things impress me about the Swift Polaris Porteur bag. The quality is top notch, and the bag has a "production" rather than a DIY look and feel to it; it is apparent that they have made a number of these already and have the process down pat. The waterproofing is well thought out: Not only is the interior vinyl, but the roll top prevents water from coming in from the sides. And, perhaps most importantly, the attachment system really works to keep the bag stable. I have tried much smaller bags that have swayed without additional decalleur support, but the Polaris feels glued in place.


The large size and the messenger-style design of the Polaris offer the freedom to carry a great deal of stuff on the bike in an enclosed, sturdy, waterproof, expandable container. Those who routinely travel with technical equipment, piles of books, and the like, will find the Polaris very handy. Those seeking a more compact bag for commuting, or an easy-access randonneuring bag, will probably want to look elsewhere. I should also mention that I find the shape of the bag slightly awkward for off the bike carry, but not overwhelmingly so. All that said, Swift Industries does take custom orders and can make alternative versions of this bag to fit a customer's needs. They also make front bags for Cetma racks, Gilman front bags for the Brompton, and Ozette rando bags, as well as a variety of panniers and saddlebags. Overall, some great products for a variety of uses.


---


POST SCRIPT: Q&A


I've received a number of questions about this bag over email. Rather than try to incorporate the info into the text retrospectively, Ipost the answers below:


Q: Is there a way to attach a cable lock?


A: This is how I am carrying mine. It does shift around a bit, but not enough to affect handling. Fine for city use, though might start to drive you nuts long distance.


Q: What size U-lock will fit into the holster?


A: I am not well-versed on U-lock sizing. A typical, standard one should fit, such as this one from Kryptonite.


Q: Will this bag fit a laptop?


A: My 13" Macbook air, inside its padded carrier, fits, but you won't be able to go any wider.


Q: Will this bag work with drop bars?


A: I have 42mm width drop bars on my roadbike. Just tried to fit the Polaris in between them. It's a tight squeeze that would render most hand positions unusable.


Q: Do the straps interfere with any of the rack's light mounts?


A: The straps do not interfere with any part ofthe VO Porteur rack. I have no experience with the Soma Porteur rack.


Q: Is there any way to tuck in the dangling straps?


A: I don't think so. But while aesthetically not great, they are nowhere near the front wheel, so perfectly safe.


Q: How much weight is this bag rated for?


A: It's your rack and bike that will be the limiting factors, rather than the bag. Be careful carrying a lot of weight on your bike unless it is designed to do so and made of appropriately robust, touring+ grade tubing. As VO puts it: "Parisian delivery bikes were reputed to carry as much as 110lbs of newspapers on similar racks, but of course they had strengthened bike frames and forks, not only racks."

RAIN! RAIN! Finally

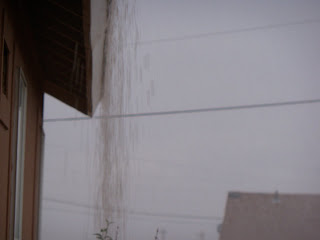
On July 20th we had the first major rain we had had in about a year. My rain gage showed just under an inch. We have been needing rain despertly and finally we got some. The whole state of NM has been in a drought for several years that had got really bad this summer. But in July what is called the monsoon rains started slowly inching their way into the state. Each afternoon we would hear of some little bit of rain somewhere. Many times we watched the clouds come in and could see some rain falling in and around the Albuquerque, Bernallio, Corrales areas, and even in down town Rio Rancho but not exactly where we are. This is when we have big, beautiful white thunderhead clouds come rolling in with a lot of them over the Sandia Mountains. The ones in these photos arn't as good as some of them but they were the ones that brought us the rain this day. We didn't really expect to get anything but a few drops as is normal when it first started and then it turned loose and became a gully-washer. A male rain as the Indians call it.If you had been in an arroyo or ditch it would have been a nasty flash flood. It is amazing how much water can come down to only be listed as less than an inch on the rain gage. The photos showing big puddles of water were quickly soaked into our thirsty ground.
The next day we got some rain again but it was only a light rain, the kind we really need so it can soak in instead of running off. A female rain.
But no where in the state have we had enough to get us back up to a decent leval of water in the rivers, creeks, and underground water table. It has been good for helping with the fires but not enough to put out that big fire that is still burning west of Los Alamos.
We are hoping for more.


Monday, June 24, 2013

Civia Halsted: the Compact Basket Bike

Civia Halsted

Civia is a Minnesota-based manufacturer of transportation and utility bicycles, known for its unisex designs and reasonable price points. I do not see many Civia bikes in New England. But for some time now I've admired the look of their Halsted model and wondered what it was like to ride. Last week I finally got the chance to find out.


Broadway Bicycle School
The Broadway Bicycle School in Cambridge, MA uses one of these as a shop bike, and they allowed me to take it out for a spin.


Civia Halsted
The Civia Halsted is a modern variation of a classic front load delivery bicycle. It is designed around a standard size (26") rear wheel and a small (20") front wheel, above which sits a frame-mounted platform. This type of construction creates extra space to accommodate a large front load, whilst also positioning the load lower to the ground.


Civia Halsted
Because the platform is connected to the bicycle's frame rather than the fork or handlebars, it remains independent from steering. This, together with its low placement, is aimed to minimise the front load's impact on the bicycle's handling.


The front platform ("rack deck") is rated for 50lb of carry capacity. It can be used on its own, or built up as a front crate/basket using modular side panels (as shown in the pictures). The deck and side panels are made of HDPE plastic. The tubes securing the platform to the bicycle's frame are steel, painted to match the bike.


Civia Halsted
The Halsted is available in one size only, and will fit riders between 5'2" and 6'5". The frame features a dropped and moderately sloping top tube. Thanks to the small front wheel, this results in a very manageable standover height for someone of my size (I am 5' 6 1/2"). I did not have to swing my leg over the back of the bike, but was able to step over the top tube after slightly leaning it toward me.


Civia Halsted
Another feature of the Halsted frame is the possibility for attaching a plaque to advertise one's business. This is nicely integrated, and makes for a fabulous-looking shop bike.


Civia Halsted
The Halsted's cro-moly frame and fork are TIG-welded in Taiwan. The finishing is smooth and attractive. The straight, unicrown fork is tiny, on account of the small front wheel, and looks good on the bike. The colour pictured is from , and the current one (shown here) looks to be a light periwinkle-gray.


Civia Halsted
The front wheel is equipped with a disc brake.


Civia Halsted

The rear with a v-brake.


Civia Halsted

The standard drivetrain is 1x9 derailleur gearing, but the semi-horizontal dropouts make it possible to build the frame up with an internally geared hub.


Civia Halsted

The "cockpit" includes a threadless stem, swept-back handlebars, rubberised grips, city brake levers and MTB style shifter.


Civia Halsted

Fenders, a rear rack or lighting are not standardly included with the bike. A double-legged kickstand is included (though I did not find it especially stable in windy conditions).


The low bottom bracket is great for toe-down stopping and full leg extension while pedaling. There is no chance of toe overlap with the small front wheel. The components included in the stock build were easy and comfortable to use.


Considering that the Broadway Bicycle School has been using this bike for over a year and storing it outdoors for large portions of the day, I thought it to be in good condition. Aside from surface rust around some bolts and components (namely the disc brake and rear derailleur), I saw no sign of weather-related damage.


Civia Halsted

My Civia Halsted test ride consisted of cycling down the road to buy groceries, then riding home to drop them off. After this I circled the neighbourhood with the front basket unloaded, before taking pictures and returning the bike to the shop. In total it was about 4 miles, on a cold and windy day. The groceries I carried were distributed between two shopping bags, and included heavy items such as milk, wine, vegetables and a 5lb sack of apples. In addition to this, I carried my camera and laptop bag, as well as a couple of books and some spare clothing. Loading all of these things into the crate, I felt that it could have been made a bit deeper, with the modular panels sturdier (they rattled a bit in motion). But I was nonetheless able to stuff everything in securely, without the use of bungee cords.


The Halsted's handling felt distinct, but fine, with and without weight in the front basket. Steering did not require special effort, though it had a quality to it that felt particular to this bike. I could definitely feel the weight in the front, but this did not result in any difficulty controlling the bicycle. One thing I noticed, was that I was taking corners wider than normally, but I cannot be sure that this is related to the handling and not to my awareness of the wide front crate. The bike rolled easily uphill and generally felt fun. I also liked being able to keep my eye on my stuff in front of me at all times. In that sense, it was kind of like riding a larger version of my Brompton.


Civia Halsted

I did not see the Halsted's geometry chart until after my test ride. But once I did, I noticed the high-trail front end (trail in the 80s, according to my calculations). Some might consider this unusual for a bike designed to carry so much weight in the front. While I cannot say how the Halsted handles at its maximum carry capacity, with a moderate front load I thought it very ridable.


When I look at pictures of Civia Halsteds in use, it is apparent that the bikes can also carry substantial weight in the rear. Owners attach rear racks, child seats, even Xtracycle extensions. The Broadway Bicycle School often uses a trailer with theirs.


Still, one major benefit of the small front wheel design, is that it increases the bike's carry capacity while keeping the wheelbase reasonable (1134mm). The overall size of the Halsted is the same as that of a typical city bike, and at 33lb it is manageable to lift and maneuver. The compact basket-bike design is worth considering for those interested in a front-load utility bike. And priced at $1,195 the Civia Halsted is a good value.


Many thanks to the Broadway Bicycle School for the test ride! More pictures of this storied local establishment here.